
1. Download the ScreenConnect Installer ScreenConnect.ClientSetup.pkg
2. Open Finder and navigate to the downloaded .pkg file
Open Finder and navigate to the location of the package.
Note: Depending on your browser, you may not need to open Finder to locate the .pkg file.
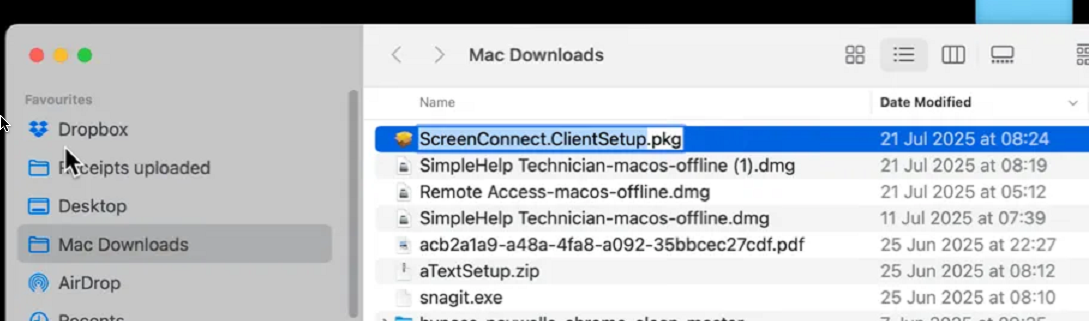
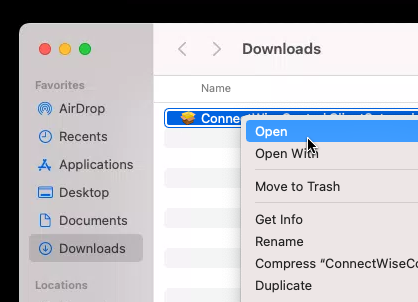
3. Hold the Ctrl key and click the .pkg file (if this doesn’t work go to point 5 below)
In order to run the package, you must open it from the context menu. Press the Ctrl key and click on the .pkg file. From the pop-up menu, click Open to run the file.
Important: If you double-click to run the installer, you will not see an option to Open it. You must open it from the context menu.
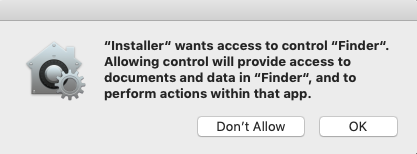
During installation, if you see the following “Installer” prompt, click OK.
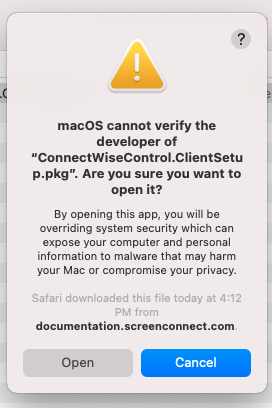
4. Open the .pkg file
You’ll see a prompt notifying that macOS cannot verify the developer of the package. This is because ScreenConnect is not a Mac application, and the package file is created each time it is built.
To proceed, click Open.
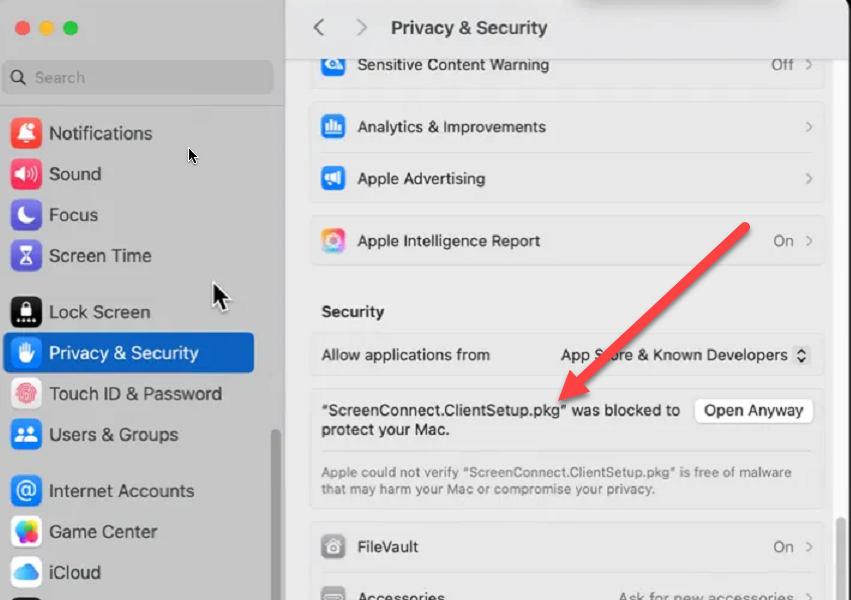
5. On newer Macs Ctrl+Click will not work to open ScreenConnect.ClientSetup.pkg
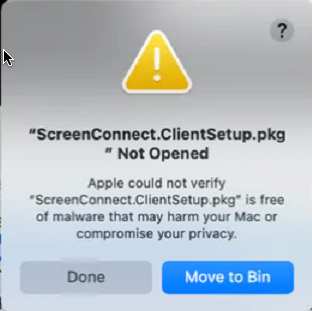
Go to System Settings > Privacy & Security > Security where you will see “ScreenConnect.ClientSetup.pkg” was blocked to protect your Mac
and click on Open Anyway
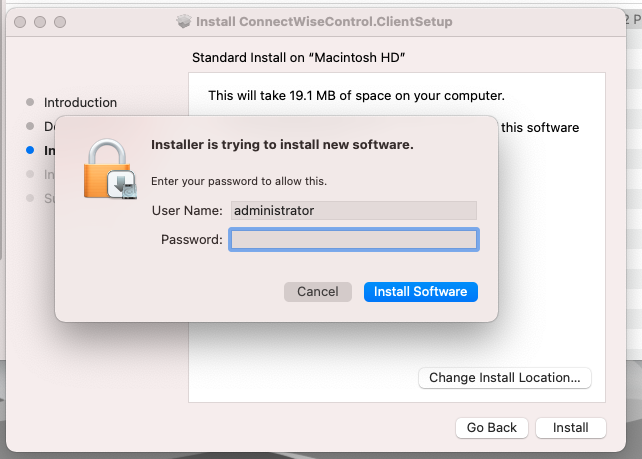
6. Follow the wizard to complete the installation of the ScreenConnect client
Follow each step of the installation wizard to install the ScreenConnect agent.
Note: To complete installation, you’ll need to enter administrator credentials.
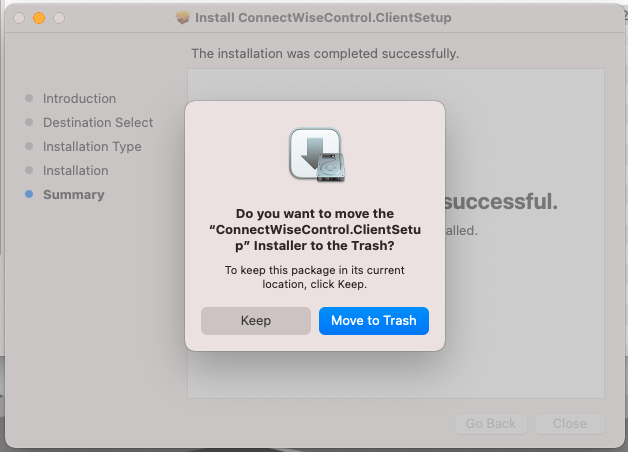
And the end of the installation, you’ll also be asked to keep the .pkg file or move it to the trash. In most cases, you can move the installer to the trash.
First connecting to an access session
1. Connect to the macOS machine
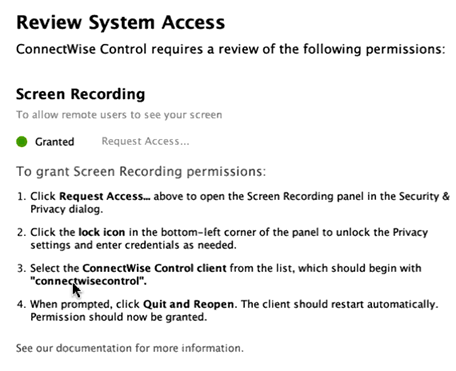
Upon connection, you’ll see a large Review System Access window.

2. Allow screen recording
In the Screen Recording section of the large prompt, click Request Access.
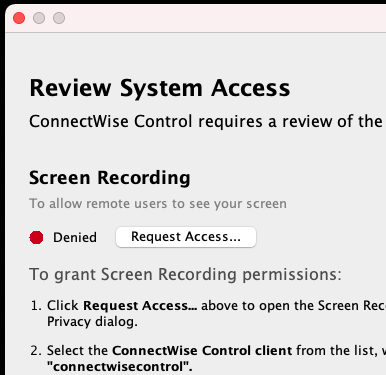
Note: Earlier versions of macOS require you to click the dialog’s padlock icon before editing the Privacy settings.

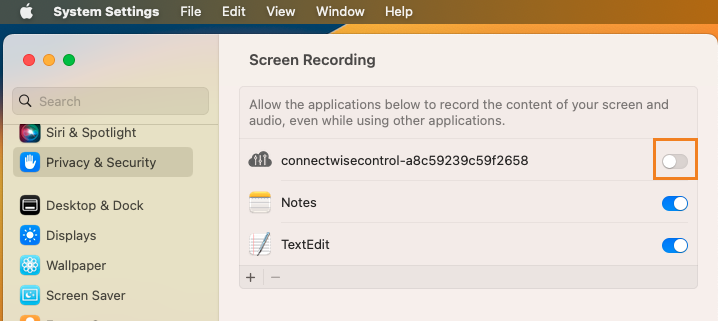
Next, click the toggle switch for the ScreenConnect client. The client name begins with “connectwisecontrol“.
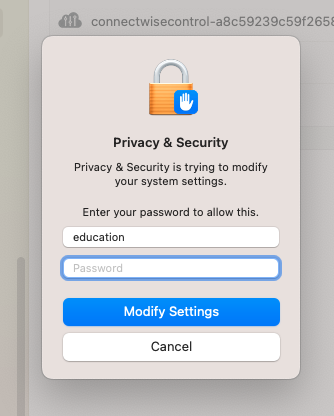
If required, enter a username and password to allow your changes.
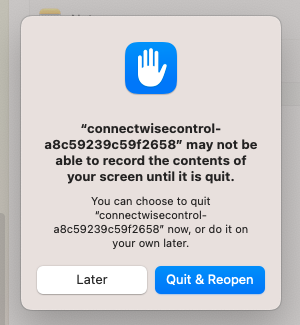
Next, a new message appears with the option to Quit & Reopen. Click Quit & Reopen and the client will automatically restart.
Once the client reopens and the large ScreenConnect prompt returns, you should see that Screen Recording access is granted.
3. Allow accessibility access
Return to the large Review System Access window. In the Accessibility section of the window, click Request Access.
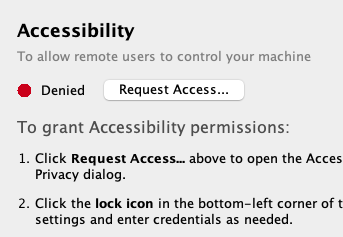
Note: Earlier versions of macOS require you to click the dialog’s padlock icon before editing the Privacy settings.
Next, click the “connectwisecontrol” switch.
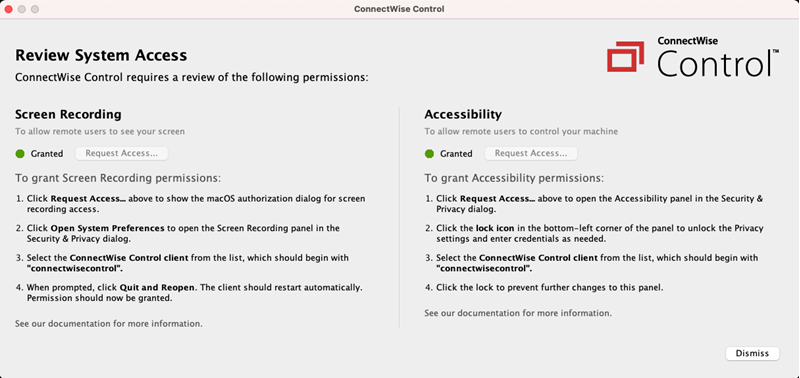
When you have finished, click the lock again to prevent further changes, and close the window.
4. Check the Review System Access window
You should see a green circle and a Granted status for both Screen Recording and Accessibility.
A technician should now have remote control over the macOS device.

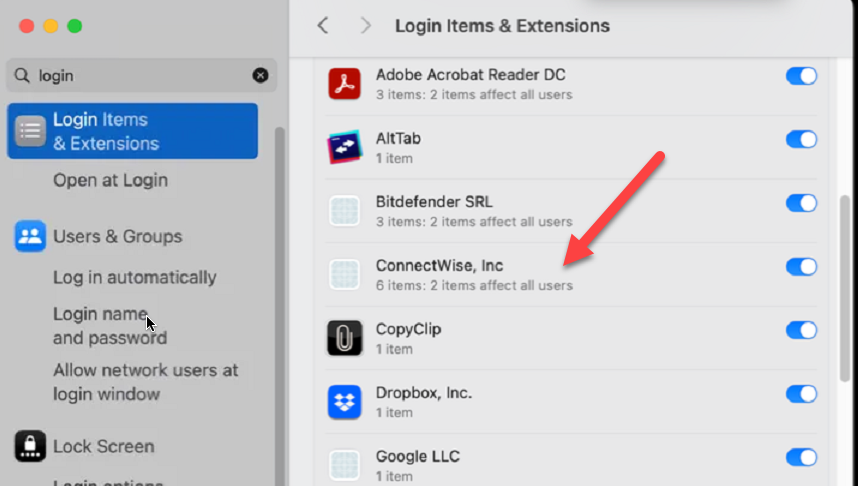
5. If the Review System Access window does not appear
Go to System Settings > General > Login Items & Extensions and ensure ConnectWise, Inc is enabled
Go to System Settings > Privacy & Security > Accessibility and ensure that Connecwisecontrol-d9253538a6fa5497 is enabled
and Go to Screen & System Audio Recording and ensure that Connecwisecontrol-d9253538a6fa5497 is enabled